This book binding workshop was intended to help support our ideas and knowledge of binding methods for Studio Brief 2, where we have to produce our own book about book binding, type setting and book making methods.
In this workshop we learnt how to make 3 book binding methods, and got to produce our own books using these methods as well.
METHOD 1 - Pamphlet Stitch
This binding method was my preferred binding method of the three that we produced. I think this because it is the most simple yet effective binding method, yet also looks delicate as well. It also allows the cover or stock to stand out, but depending on your stock and thread choice you could produce some really interesting colour combinations. I think this is also the most normal binding method as well, and gives very easy access to the pages, unlike the other two methods we tried.
 |
| We used 6 sheets of paper, and then one coloured piece of paper, and folded then down the middle, using a boning tool to strengthen the crease. |
 |
| On the inside piece of paper we marked crop like 0.5mm from the outside. |
 |
| We also measured the centre of the book along the shortest side, and then 3cm either side of the centre point, and marked these two. We then used a needle to piece the holes through the three marks down the spine, but NOT the crop marks. |
 |
| This is what the holes look like from the outside cover. |
 |
| We then sewed white thread through these holes, starting at the middle hole from the inside of the book, then to one hole, then the other hole and then back through the middle so the thread ends up on the inside again. We then tied the thread in a double knot, with each thread coming from a different side of the central thread, so that the stitch stays in place. |
 |
| This is how the sewn binding looks like from the cover. |
 |
| We then cut the thread to a more manageable size so it doesn't get in the way of folding the book, but till has some left so that the knot doesn't unravel. |
 |
| This is the final book. |
METHOD 2 - Stab binding
This is my least favourite binding method as although the sewn aspect looks really attractive from the outside, it means you can;t open the book flat without bending the cover massively permanently, and also means you can't use the whole potential of the page either. However I do really like the endless possibilities of patterns you can sew the bound edge into, such as triangles of squares or rectangles, to create whatever pattern you want, as this gives the cover a more personal appearance. I also enjoyed sewing the bound edge, as it was more challenging than the previous binding method.
 |
| We needed two sheets of coloured paper for the cover, and then 7 sheets of white paper for the pages, then one piece of thick card to make the marks in for drilling, and to drill through as a guide. I chose pink and blue as I thought it would make my book more interesting and unique having different coloured cover sides, and also because I couldn't choose which colour would look better with the light pink cover from the first binding method. |
 |
| We had to mark 0.5mm in from the edges for the crop marks, then the centre point of the board, and then two more points either side of the centre point to sew through for the binding method. We were supposed to make out holes even distances apart to create squares for the sewn part, however I found it tricky to do the maths in y head so I split each part into 4 parts and then just used the two outer point for the holes. We then had to drill through these point on the drill to make the holes in the book for sewing. |
 |
| As you can see here the whole book has been placed in the right order as well as the board and then clamped together for drilling. I drilled through all the necessary holes, making sure I positioned the drill before drilling so that I knew it was going to drill in the right place. |
 |
| These are my holes once they have been drilled. |
 |
| We then had to sew the holes together roughly to keep the whole book in place so we could unclip the book from the board. |
 |
| We then sewed through the holes in the correct order, starting from hoes to the right of the centre, making sure we loop over the book where there isn't a loop, and always going in the right direction, and never going back on a stitch we had already sewn. Once we got to the end we had to loop round the side filling in all the gaps we had missed on the way down, and continuing on the other side of the centre point as well. |
METHOD 3 - Concertina Book
This was a different kind of binding method to the other two as it involved a lot of glue and no sewing or making holes for the binding. It also involved two sheets of card to make the cover as well, which was different to the other two binding methods which only used slightly thicker card for the cover. I enjoyed making this book, however the glue was a little difficult as you had to make sure you didn't put too much on otherwise the pages got stuck together, which mine did a little bit, and it was a bit tricky to peel them apart.
 |
| First we folded out 7 pieces of paper in half individually then placed them in this concertina shape ready to be folded up and glued together. We also drew x's on each side of each piece of paper so that we will know where to glue in the next stages. |
 |
| We then folded up the pieces of paper in the same arrangement we laid them out in, and clamped one side ready for glueing. |
 |
| We glued one strip down each side of each piece of paper where there was an "x" on each side, swapping over the clamp when one side was finished. Once completed and opened up this was the result. Because the stock we used was perhaps a little too thin, or because I had put a bit too much glue on, the pages went a little wrinkly. |
 |
| These are the two pieces of card we will use for the cover, and the glued book to the right. |
 |
| I chose a sheet of grey covering for my book, which was made out of this plastic woven material which was very easy to clean and cut. We placed the cardboard pieces on the cover, making sure there was one rulers width between the edge of the cover and the cardboard, and two ruler widths between the cardboard sheets themselves. |
 |
| We then drew round the cardboard sheets so we knew where to glue them down. |
 |
| We glued them down to the cover, then using a boning tool burnished the cover from the other side, making sure all the air had gone out from under the cardboard pieces. We also went round the sides of the cardboard, so that the cover stuck to the sides a little better, and created a clean edge. |
 |
| We cut out the cardboard using a craft knife, leaving one rulers width all around each card.board piece |
 |
| We also cut off the corners of the cover, so that they were only 2 or 3mm away from the edge of the cardboard, making it easier for us to fold it later. |
 |
| We then folded and glued down the remaining cover over the edges of the cardboard, so that the cardboard cannot be seen from the front. We had to fold in the corners slightly to avoid pointed corners too. In this photograph you can see the front and the back of the covers. |
 |
| Cover corner detail. |
 |
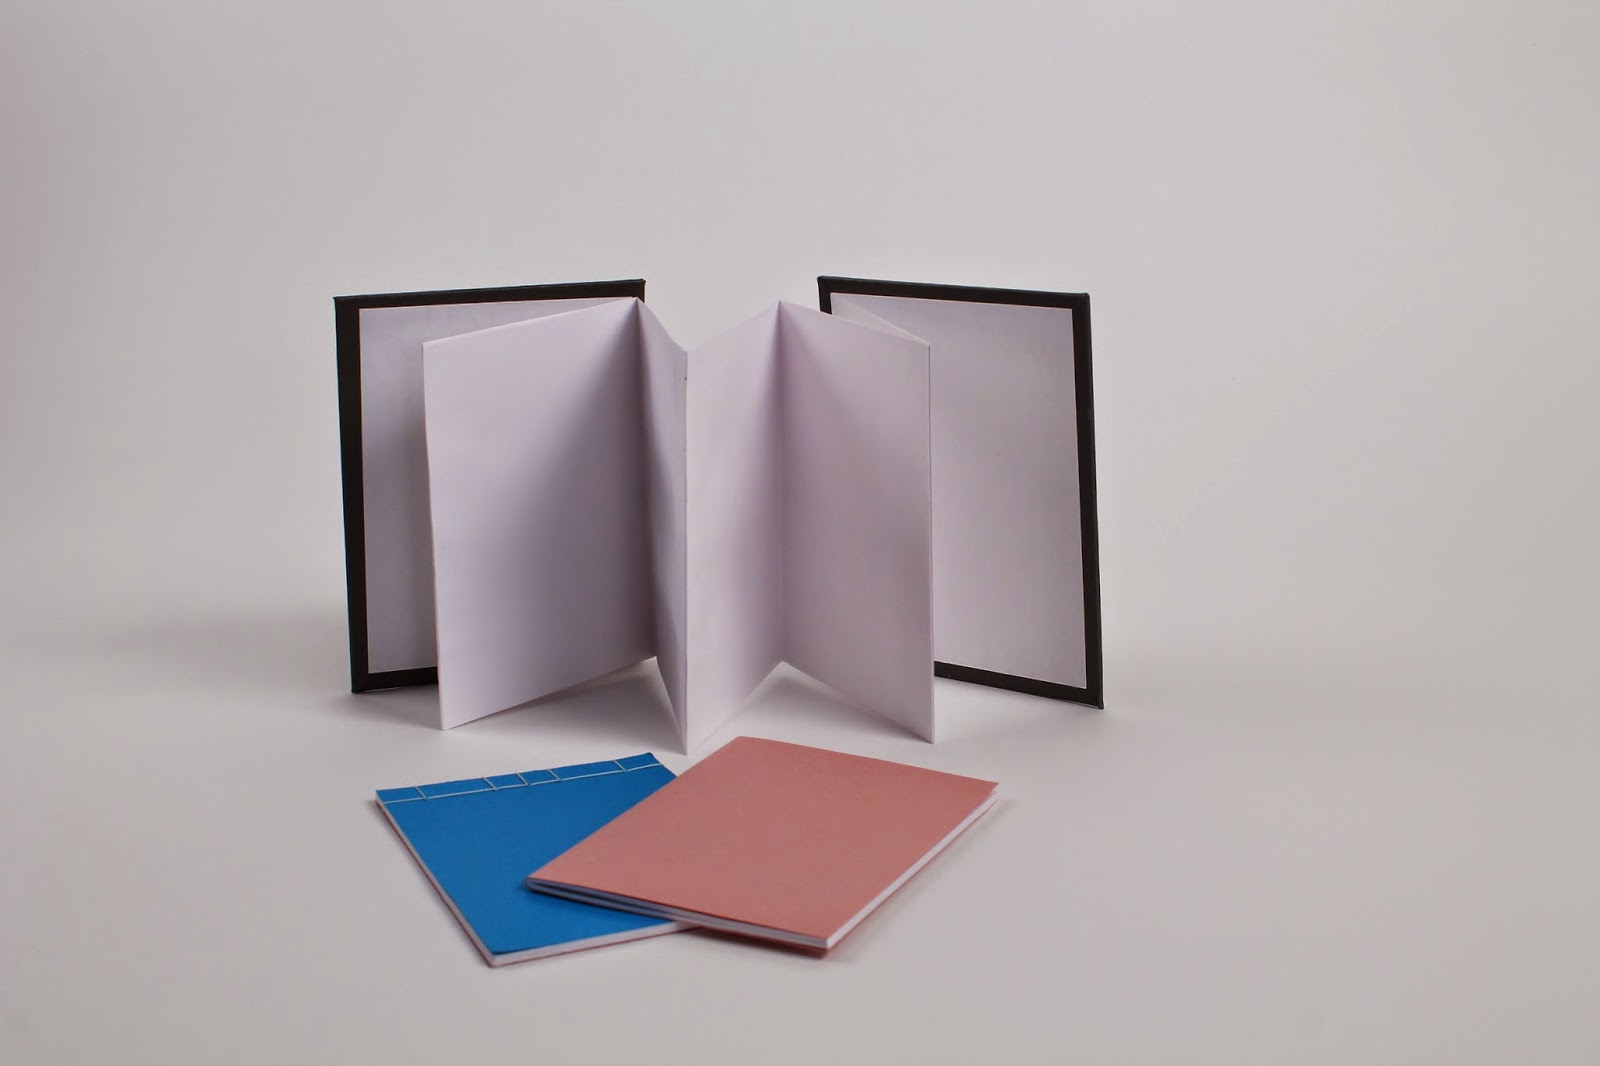
| We then glued the book pages to the cover, and put it in the press to make it nice and flat, and to secure the glue a little bit. As you can see it opens just like a normal book. |
 |
| This is is standing up. As you can see the covers don't actually join with a spine, but this is so the book can be opened fully, like an accordion. |
Final books
This book binding workshop has been really useful to me for this brief because now I have the basic knowledge of how to actually make 3 different kinds of books, which I had no idea of previously. It has also shown me all the different possibilities with stock and thread and sewing methods, which I wouldn't of really put any thought into previously.


No comments:
Post a Comment